There are multiple ways a technician can approach an auto repair problem, and it varies by the issue. This is why it’s important to create a solid diagnostic process that can be implemented across the board to ensure that problems can be solved accurately, in a reasonable amount of time.
Recently, our very own ProDemand Product Manager, Mike Alberry, sat down with Motor Age to illustrate how you, the technician, can use component and diagnostic tests to arrive at an accurate diagnosis and how to navigate through your repair information from start to finish most efficiently. In case you missed it, here is some of the valuable advice Mike shared.
What is a good starting point for technicians when doing component and diagnostic tests?
Regardless of whether you are familiar with the issue the vehicle is having or have never encountered it before, the first two things that you should do are:
- Gather as much information as possible from the vehicle owner. Understanding what they are experiencing will help determine your starting point.
- Next, verifying or duplicating the problem will confirm your diagnostic direction.
If the technician has experienced the issue before, what would they need to do next? Example?
If this is a problem you have experienced before, you may only need to refer to your component testing information, such as the Component Tests QuickLink in ProDemand (Figure 1). For example, let’s look at a Chevy Tahoe with a temperature gauge that doesn’t work. You suspect the Coolant Temp Sensor.
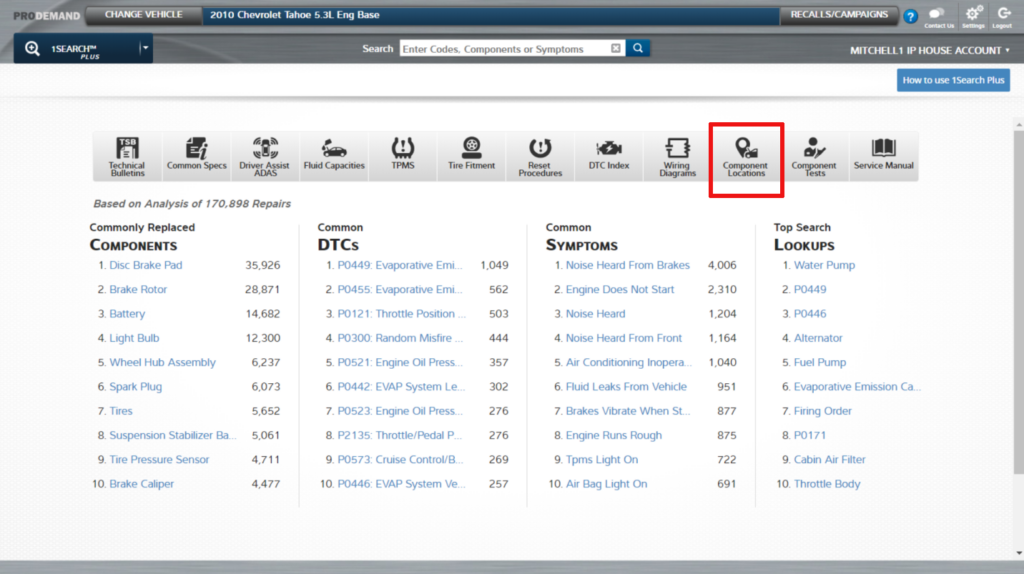
When using the Component Tests QuickLink, you will find very specific component testing information (see Figure 2). It includes a number of systems on the vehicle. Once the component is selected, it shows operation, location, connector and specific tests for that component. It provides all the info you need to fix the problem.
What if the technician has NOT had experience with the issue before, what would they need to do? Example?
Besides gathering information from the vehicle owner and verifying or duplicating the problem, you may have to dive into a variety of information types, like technical service bulletins (TSBs), OEM information and other content provided by your repair information.
This can be time consuming; however, that is why ProDemand with the 1Search Plus advanced search engine has been designed with sophisticated searching algorithms to take your search term, find the most relevant information and present it in a single lookup that is formatted with a logical diagnostic approach.
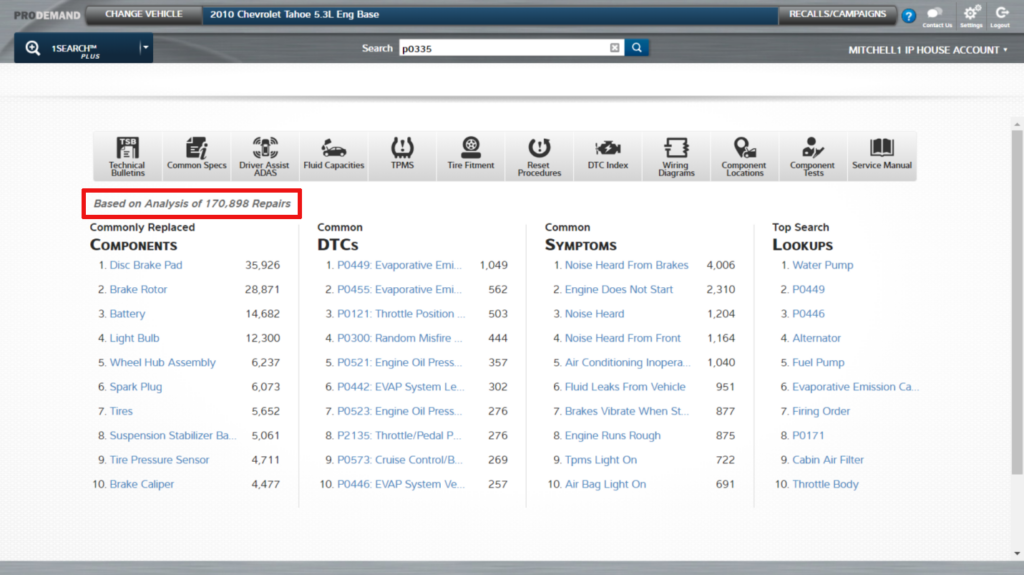
Using the same example with the Tahoe, when hooked up to a scanner, a P0335 Crank Position Sensor code was pulled. ProDemand has over 500 million repair records available on the vehicles it supports. For this particular vehicle, there are over 170,000 repairs in the ProDemand database (Figure 3)! To expedite a search, ProDemand includes a Top 10 list of most commonly seen repair issues, but because the P0335 code is not a top issue seen in this vehicle, you will have to do a search for it.
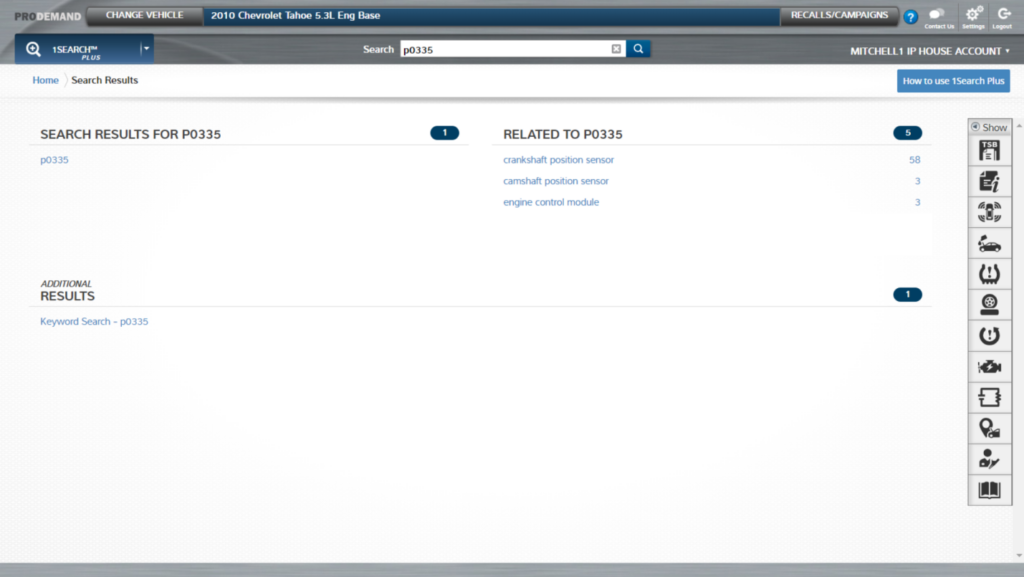
The search results bring back both the code and possible components. You will want to select the code (Figure 4).
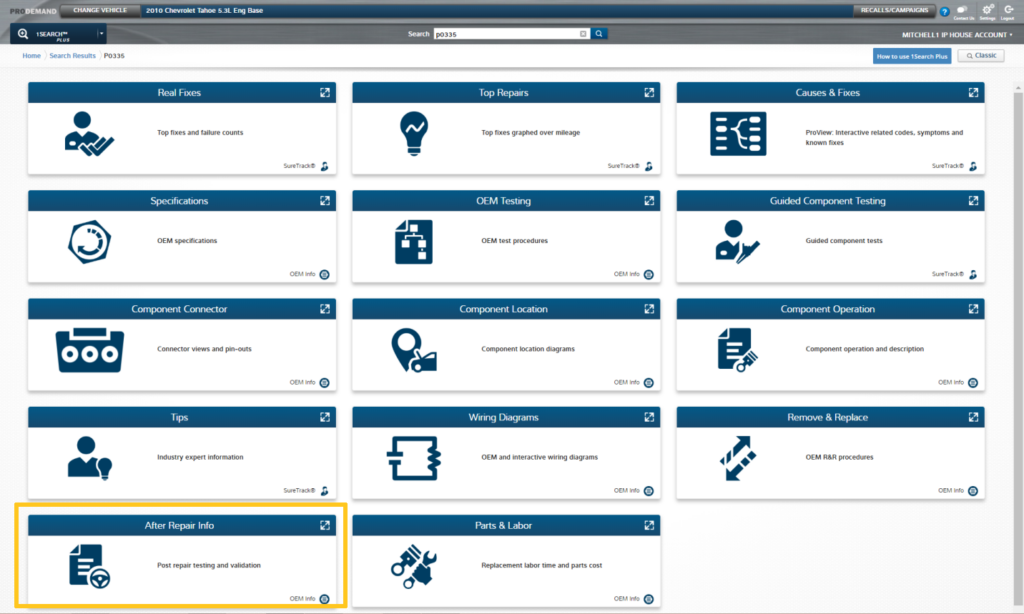
Click the code and you can see that there is a lot of information (Figure 5). This is why it is important to have auto repair information that is well organized. For ProDemand’s 1Search Plus, information is arranged in “cards” for each set of information.
Industry Fixes (red highlighted region): These are exclusively gathered by Mitchell 1 for this problem for this vehicle.
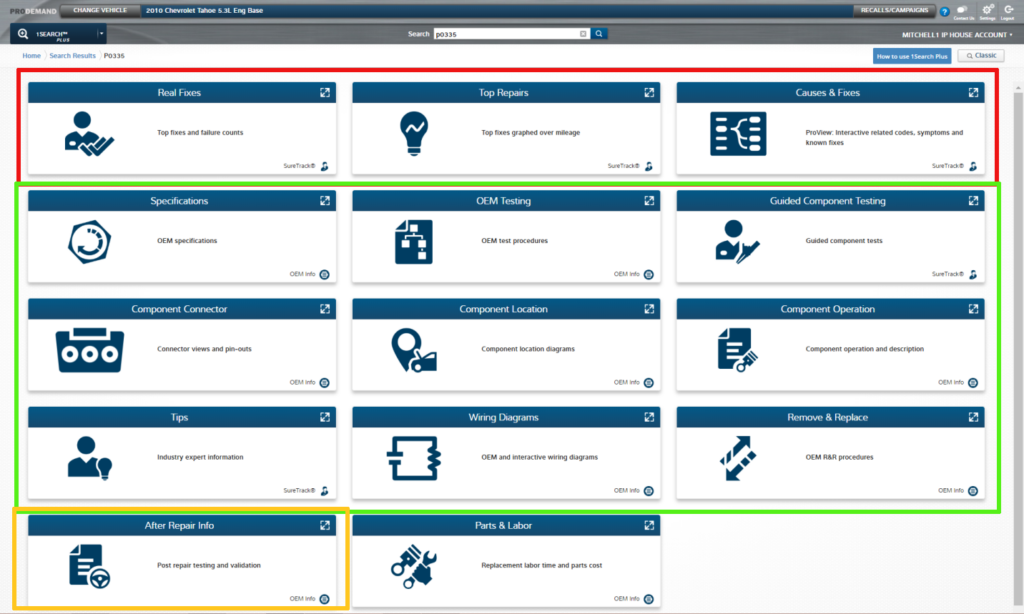
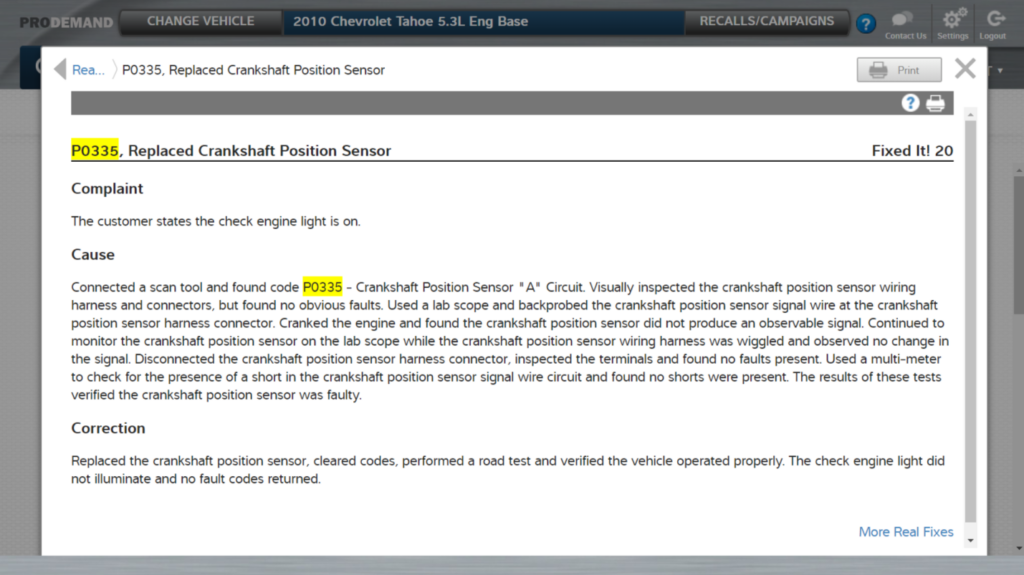
For our Tahoe example, the Real Fix, Top Repairs and Causes & Fixes cards were returned. It may be the first time you’re seeing the problem, but there’s a good chance somebody else has seen and fixed this problem. The Real Fixes card follows a Complaint – Cause – Correction approach, and it offers great insight to the problem.
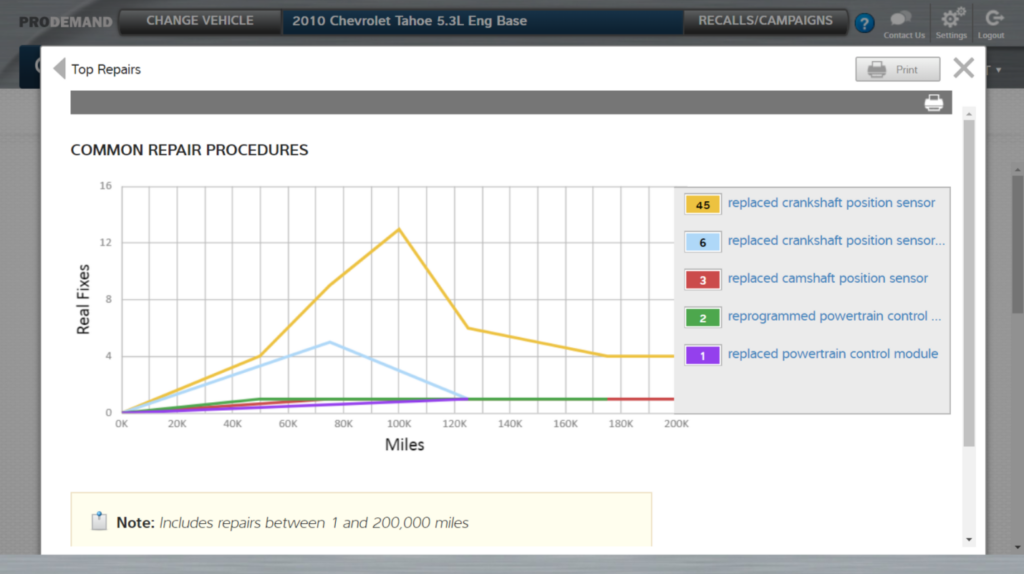
Looking at the Top Repairs card (Figure 7), you’ll find that the information not only includes what was found and how it was fixed, but the frequency of occurrence and the mileage when the problem happens.
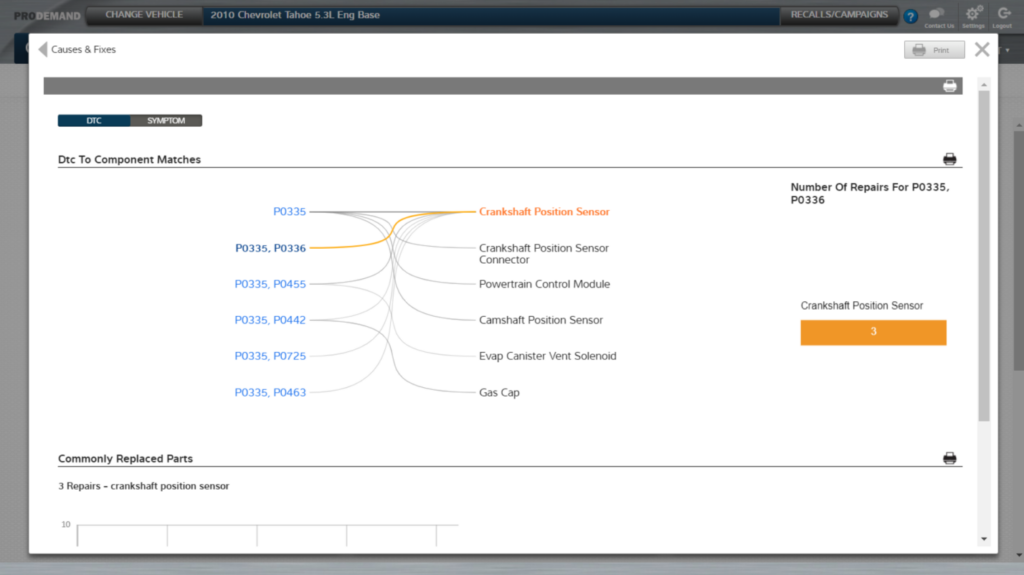
And after selecting the Causes & Fixes card (Figure 8), you can also interact with the dendrogram graph by picking the circumstance that best fits your problem.
Once you’ve determined your repair approach, you can move forward with testing the component.
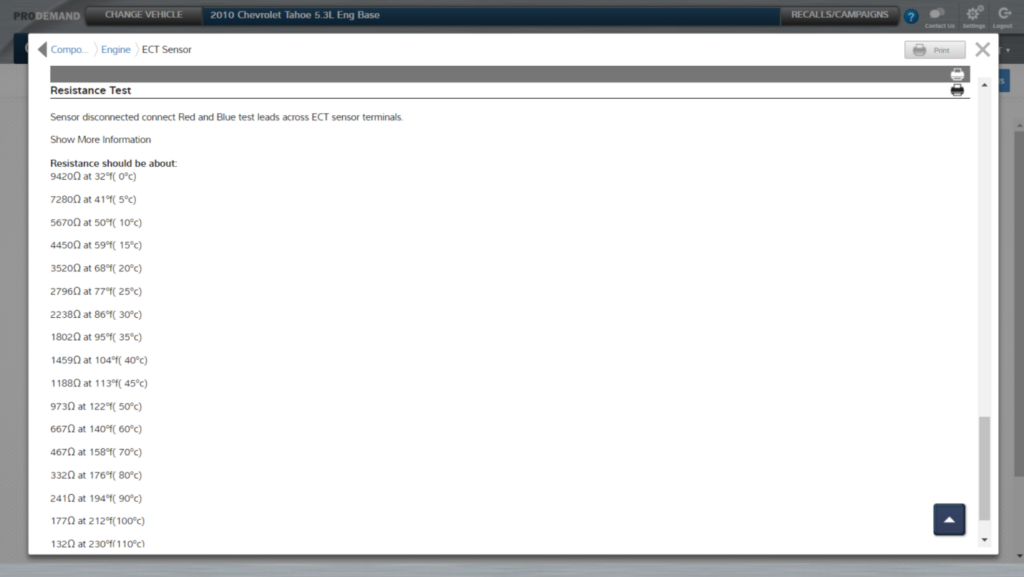
Testing (green highlighted region): Shows the testing for this code/component (Figure 9).

Once you have gotten to this point, it is important to remember to “test don’t guess.” I remember a tech having a car that set codes for a TPS, IAC and O2 Sensor. He replaced all of the components, and the car was fixed. Had he tested things, he would have found that only the TPS needed replacing because the other components were compensating for or responding to the loss of the TPS signal.
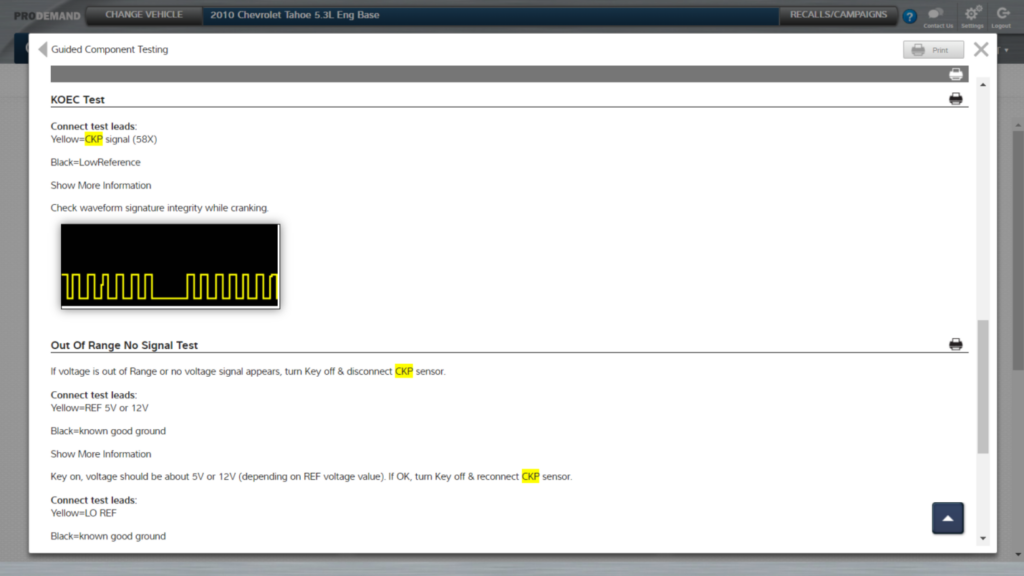
Once you select the Guided Component Testing card, you have everything you need — operation, location and connector are right there! Specific tests and known good waveforms are available as well (Figure 10).
Confirmation (yellow highlighted region): Shows how to confirm the fix (Figure 11).
Just because the repair was completed and a road test was done does not mean that you are finished. Most cars today actually need an additional step, after repair care. This means the car needs to be relearned or “introduced” into the system before it will function as designed.
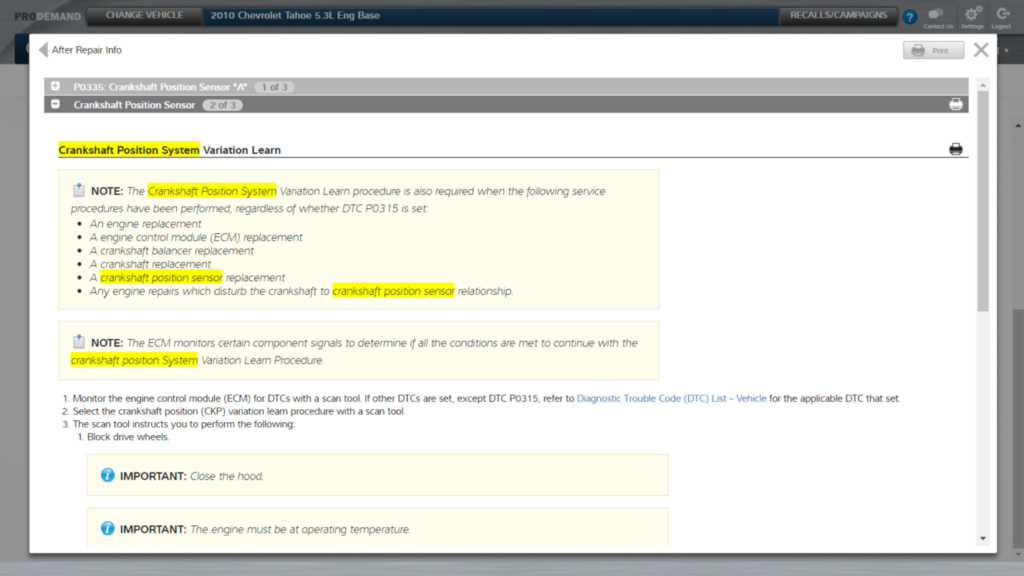
The After Repair card captures all the steps and tools a technician needs to complete the repair. In this case a scan tool is required. Following the instructions provided on the tool and the steps in this card will help complete the fix. These simple steps will ensure that you’ve correctly fixed the car.
Component testing is an important part of a solid diagnostic process and can help technicians of any level solve problems accurately and efficiently.