Manual transmission noises are fairly straightforward to isolate. The sound a transmission makes as a failure unfolds can help the technician to determine the issue.
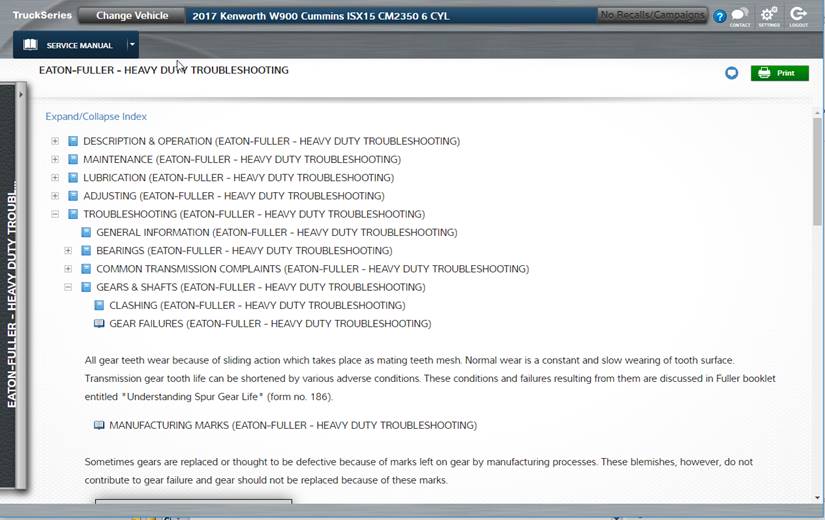
Sounds associated with gears and bearings vary or disappear depending on the gear position selected and vehicle speed. From those sound clues, the technician may look at the transmission power flow charts to determine which gears and bearings are in operation when the sound occurs. Once the noise has been isolated, it may be time to pull the transmission out of the truck to take a look inside. This is when things get exciting.
Once the transmission is out, there is often a great temptation to simply start tearing the transmission down to get parts ordered. However, that tactic may not be the most efficient way to get started on the repair. A vital part of any transmission repair is to determine what exactly failed and why it failed.
The following list serves as a basic checklist of procedures to help the technician determine the cause of failure.
- If possible, check and/or observe driver operating habits. Improper operation may result in numerous transmission failure conditions. If the driver’s operation is not corrected, any repair will only be temporary.
- Check the transmission fluid level and also note the fluid condition. In addition, check to be sure it is the proper fluid for the transmission and application. Incorrect fluid types can cause premature gear and bearing failures. Furthermore, shifting difficulties may also be attributed to incorrect fluid type.
- Inspect for transmission alignment to engine/bell housing mounting surfaces, mounting bolt tightness, and mounting wear or damage.
- Examine the transmission for existing fluid leaks. While flat gasket surfaces may be corrected with new gaskets, wear areas such as input and output, as well as shift lever, should be particularly noted for further inspection during transmission disassembly.
- When draining fluid, note the material, if any, collected at the transmission drain. Keep in mind that virtually all transmissions will have some wear material at the transmission drain.
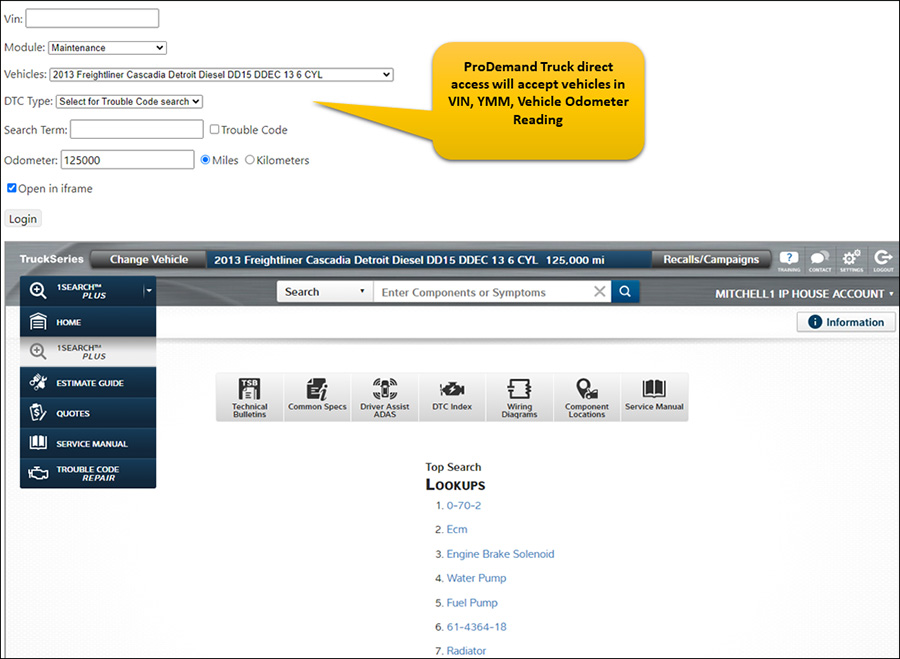
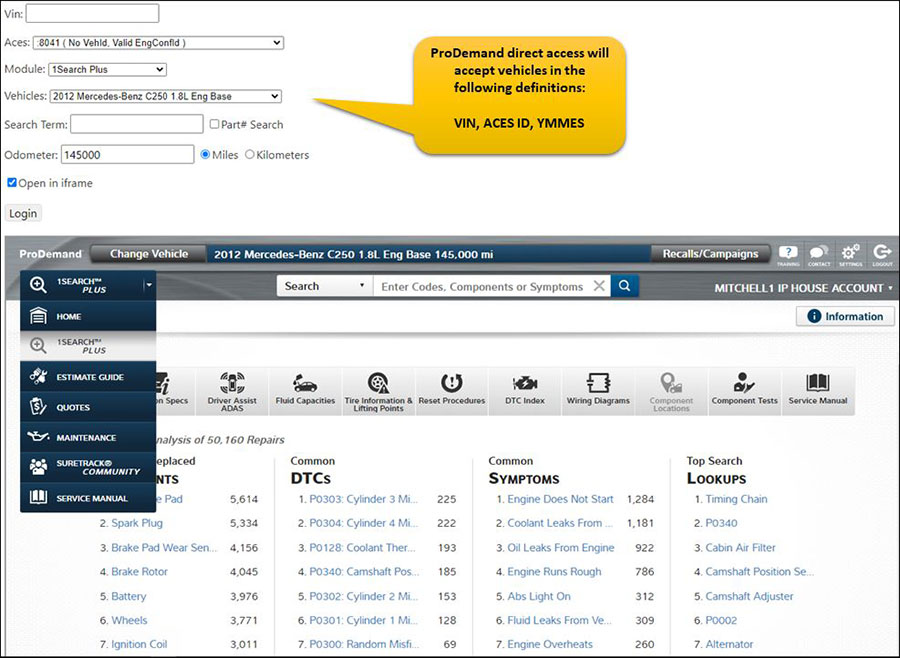
- Refer to your service information resource, like TruckSeries from Mitchell 1, to see if any pre-disassembly measurements need to be taken. These measurements will often help to identify failures related to shift concerns. Even though measurements will be called out during reassembly, noting excessive or insufficient end play points will alert the technician to issues that could go unnoticed after transmission disassembly. In addition, recognizing end play prior to disassembly provides an opportunity to order any potentially needed end play spacer washers.
- Before starting disassembly, check the appropriate service information to see if any additional measurements or inspections specific to the transmission need to be made. If no specific measurements or inspections are noted, it is a good practice to record wear and damage as each component is removed, assembling a needed parts list as you go.
These few simple steps can help the technician identify transmission failure causes more thoroughly and efficiently. Granted, these initial steps do take time. However, hidden concerns that go unnoticed when not taking a few extra steps can result in many hours —or even days — of extra downtime waiting for parts that could have been delivered in the initial parts order.