How to Enter Vendor Invoice # Once in P.O. Worksheet to Show in Each Part Ordered for Warranty Later
The Manager SE shop management system has many powerful features to help you run your auto repair business. Here’s a valuable tip that will save you time processing parts for warranty.
When vendors need to warranty a part, they will ask for their invoice # as the record of when it was purchased. It can be a tedious exercise to copy the vendor invoice into every part that was ordered on a purchaser order with them. Most shops will skip this step and spent much more time later searching for that vendor’s invoice # to process the warranty.
To help shops get this done with less effort, a feature was added so that a vendor’s invoice # can be entered just once on the P.O. Worksheet and then copied down to all parts ordered on that P.O. This would be visible for each part ordered; now on the Order screen or later in the History screen invoice. Later when a part is found to be defective, it would just be a matter of looking up the history invoice part details. Opening that part line instantly reveals that vendor’s invoice #.
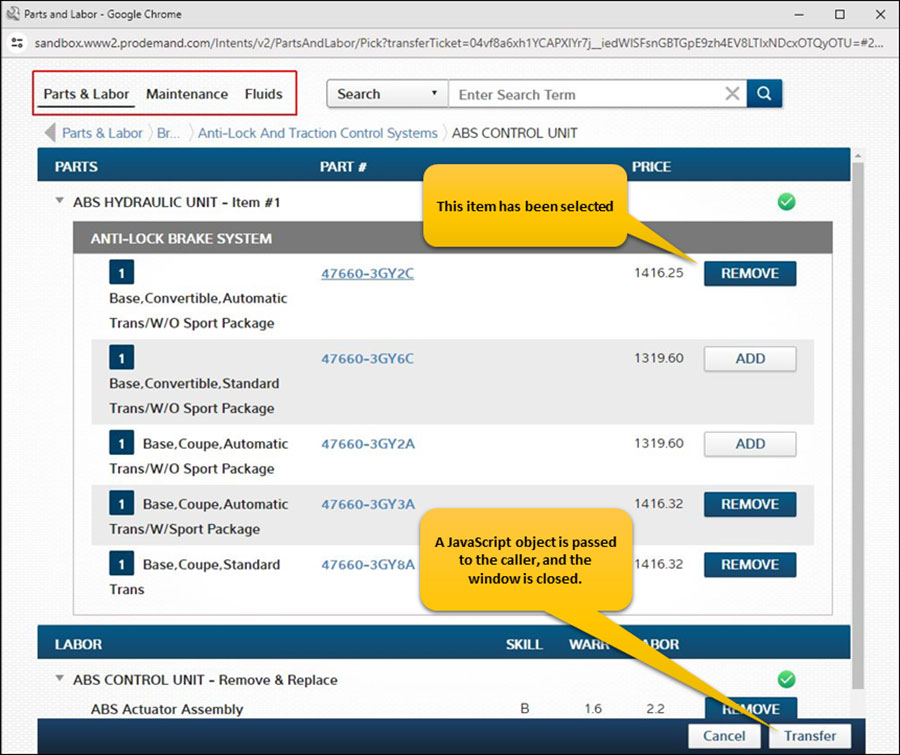
- With customer/vehicle selected, start an Estimate. Add labor and any parts on hand needed to perform repairs.
- Click the appropriate catalog button to select non-stocked items. Transfer the part(s) back to Order screen.
- Quote the customer and get their approval to do the work; then convert the Estimate to a Repair Order.

- Click on Parts Ordering; your part(s) should be listed as ready to order with the correct vendor selected.

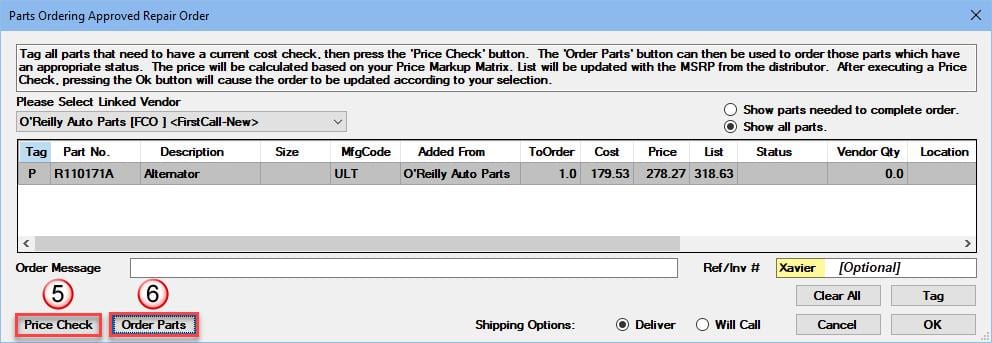
- Click on Price Check; if you want to enter customer name, etc. in the Ref/Inv # field, do it now. [optional]
- Now click on Order Parts; this transmits the electronic P.O. to the vendor.

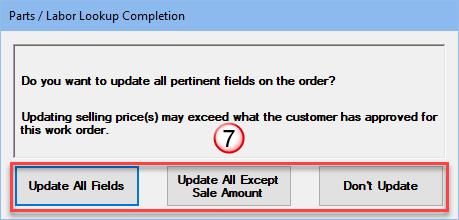
- Then select your preferred Update method below; the Parts Ordering process has been completed.
 The part(s) have been ordered electronically from the vendor and now the shop now waits for their delivery.When the vendor part(s) arrive, they need to be received into your system and specifically to this Repair Order:
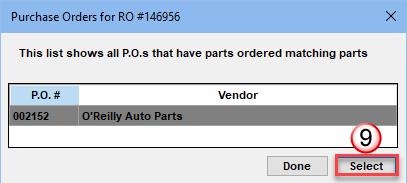
 - With the intended Repair Oder open, click on the View PO button to start the process.

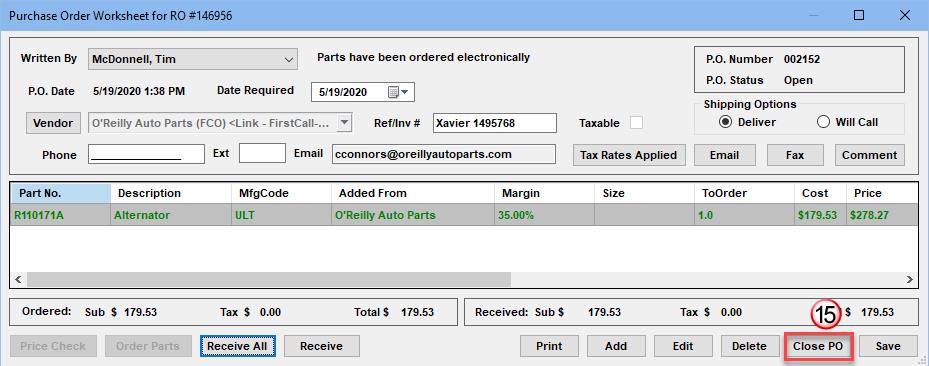
- Then click on Select to open the P.O. Worksheet where you will enter vendor invoice # and receive parts.

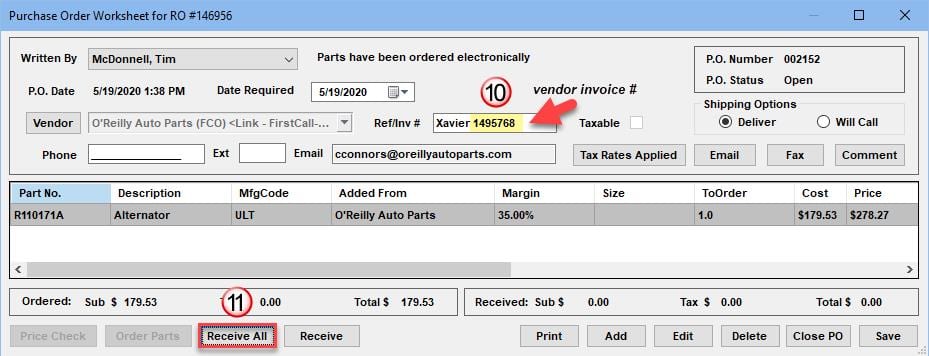
- IMPORTANT: You must enter the vendor invoice # (on vendor’s parts bill) into the Ref/Inv # field now. NOTE: If you previously entered something in Ref/Inv # field, vendor invoice # will be appended to it.
- Click on Receive All to receive the parts to your Manager SE system.

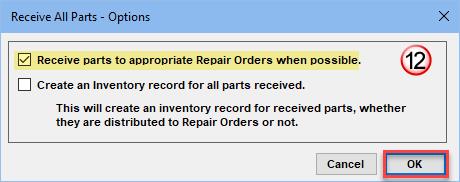
- IMPORTANT: You must check the box for Receive parts to appropriate Repair Orders when possible. (this only needs to be done once) The ‘Create an Inventory record for all parts received’ remains optional.

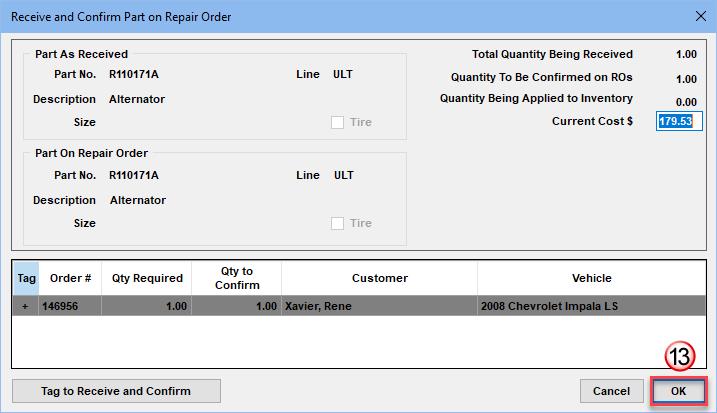
- The ‘Receive and Confirm Part on Repair Order’ screen appears; your part should already be tagged and cost not likely to have changed since you ordered it. That is intended click on OK to continue.

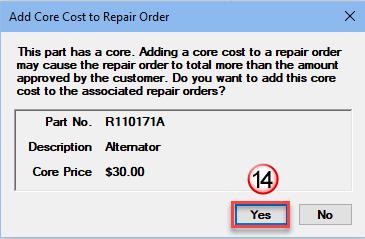
- If there is a core involved with your part, this Add Core Cost box will appear. This provides an additional opportunity to add the core charge to the customer’s invoice. If no core, disregard this and continue to step15.

- The part now appears in green, confirming it has been received by your system. Click on Close PO.


The process is now complete. Below is a History screen example of a future vendor invoice # lookup.
Once the Vendor Invoice # is saved and the P.O. closed, it will be visible now while still active as Repair Order or Invoice and also later as a simple History invoice lookup.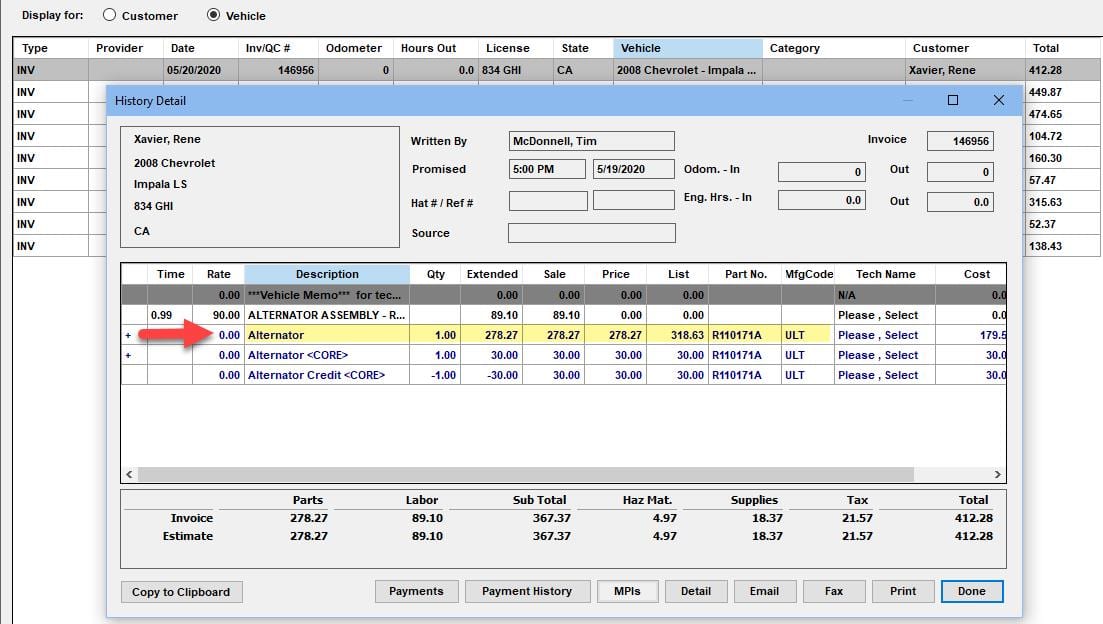
Double-clicking on the part line to open Part Item Edit window confirms the vendor invoice # has been recorded.
This will be very handy when looked up later, should a warranty claim and part replacement become necessary.