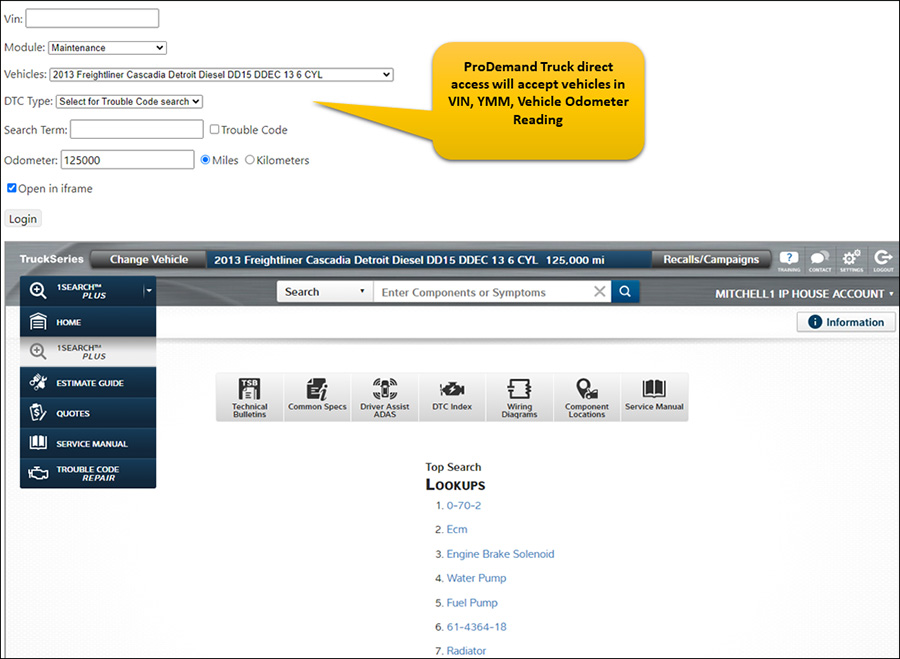
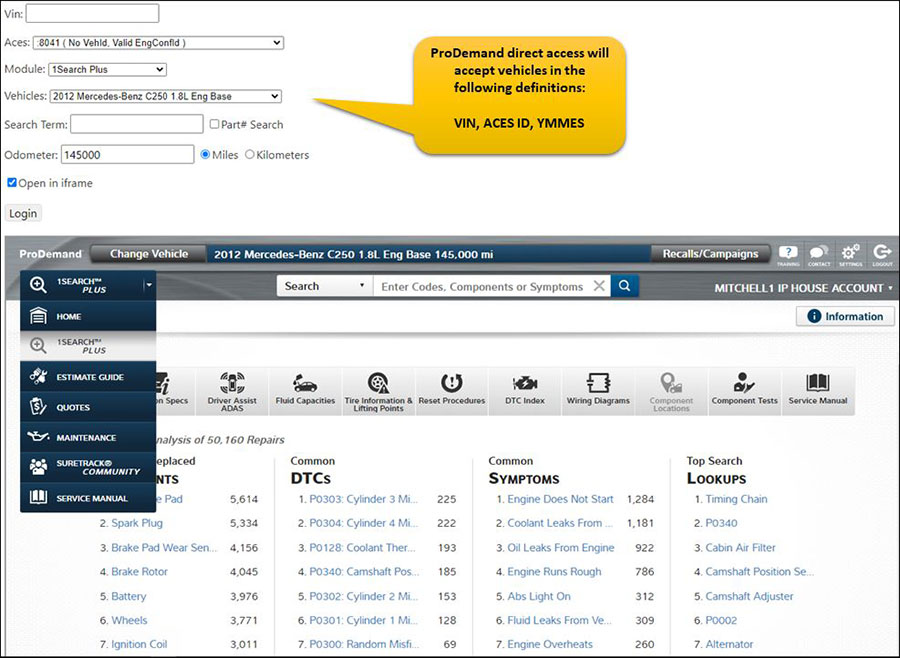
 Mitchell 1 provides TPMS information to Modern Tire Dealer, an award-winning publication that writes editorial content geared to independent tire dealers. We’re sharing this content in our blog, with a link to the Modern Tire Dealer website where you can read the article in full. The TPMS information in this article may also be accessed in the reset procedures tab in our ProDemand® auto repair information software, along with other important reset procedure data for the selected vehicle.

SUBJECT VEHICLES: 2011-2017 Dodge Grand Caravan.
RELEARN PROCEDURE? Driving the vehicle for a minimum of 5 minutes while maintaining a continuous speed above 20 mph will get the system to learn the new sensor ID code.
SPECIAL TOOLS NEEDED? No.
IMPORTANT: This vehicle uses the 433 MHz tire pressure monitoring system (TPMS) sensor. Although 315 MHz and 433 MHz sensors are identical in size and shape, they are not interchangeable. Always make sure the correct sensor is being used. An RKE-TPMS analyzer can be used to determine the sensors frequency without having to demount the tire.
CAUTION: The cap used on this valve stem contains an O-ring seal to prevent contamination and moisture from entering the valve stem. Retain this valve stem cap for reuse. Do not substitute a regular valve stem cap in its place.
CAUTION: Do not attempt to install a tire pressure sensor in an aftermarket wheel. Use tire pressure sensors in original style factory wheels only. If aftermarket wheels are installed, and therefore do not contain tire pressure sensors, the system will not function properly and the driver will be continuously notified of a system malfunction.
CAUTION: After inspecting or adjusting the tire pressure always reinstall the valve stem cap. This will prevent moisture and dirt from entering the valve stem, which could damage the tire pressure sensor.
CAUTION: The valve stem used on this vehicle is made of aluminum and the core is nickel-plated brass. The original valve stem core must be reinstalled and not substituted with a valve stem core made of a different material.This is required to prevent corrosion in the valve stem caused by the different metals.
CAUTION: Any time a sensor is to be installed in a wheel, it is necessary to install a new sensor-to-wheel seal, metal washer and valve stem nut, to ensure air-tight sealing (see Figure 2).
CAUTION: DO NOT reuse the sensor-to-wheel grommet. Always use a new grommet when installing a pressure sensor and properly torque the sensor nut.
Removal
1) Remove the tire and wheel assembly from the vehicle.
2) Demount the tire from the wheel following the tire changer manufacturer’s instructions while paying special attention to the following to avoid damaging the pressure sensor:
• When breaking the tire bead loose from the wheel rim, avoid using the bead breaker in the area of the sensor. That includes both front and rear beads of the tire.
• When preparing to demount the tire from the wheel, carefully insert the mounting/demounting tool 280 degrees +/- 10 degrees from the valve stem, and then proceed to demount the tire from the wheel.
Use this process on both the upper and lower tire beads (see Figure 1).
3) Remove the sensor to the valve stem retainer screw (4) and then remove the sensor (1) from the valve stem (2). See Figure 2.
4) Remove the valve stem from the wheel (see Figure 2).
Installation
1) Wipe the area clean around the sensor/valve stem mounting hole in the wheel. Make sure the surface of the wheel is not damaged
2) Insert the new valve stem into the rim and pull through with a standard valve stem installation tool.
3) If replacing the valve stem only, verify that the flat sides of the brass extension on the bottom of the valve stem are at a 90 degree angle with the wheel (see Figure 2).
4) Position the pressure sensor over the brass extension.
5) Install the retainer screw and torque to 12 in.-lbs. (1.4 N.m)
6) Mount the tire on the wheel following the tire changer manufacturer’s instructions, paying special attention to the following to avoid damaging tire pressure sensor:
Rotating wheel tire changers
Once the wheel is mounted to the changer, position the sensor valve stem approximately 280 degrees from the head of the changer in a clockwise direction before rotating the wheel (also in a clockwise direction) to mount the tire. Use this procedure on both the upper and lower tire beads (see Figure 4).
Rotating tool tire changers
Position the wheel on the changer so that the sensor valve stem is approximately 210 degrees from the head of the changer in a clockwise direction from the mounting end of the tool (see Figure 5).Make sure the sensor is clear of the lower bead breaker area to avoid damaging the sensor when the breaker rises. Rotate the tool in a counterclockwise direction to mount the tire. Use this procedure on both the upper and lower tire beads.
7) Adjust air pressure to specification. Make sure the original style valve stem cap is securely installed to keep moisture out of the sensor.
Install the wheel and tire assembly on the vehicle.
8) Drive the vehicle for a minimum of 5 minutes while maintaining a continuous speed above 20 mph (32 km/h).
During this time, the system will learn the new sensor identification code and will clear any DTCs automatically.If a sensor cannot be trained, see the appropriate manufacturer service information.
Torque specifications
Component Ft.-lbs. (N.m)
Wheel nut 110 (140)
In.-lbs. (N.m)
Torx screw 12 (1.4)
Read more: