Those words bring out all sorts of customer frustration when they appear on the work order.
Most of us have been on the customer side reading those fateful words for something where we know a problem exists. After all, we brought the vehicle into the shop for a reason. Our response may be: “I know there’s a problem! Don’t you want to work on it?”
The frustration increases to monumental proportions when the problem is a blaring fault code indicator light on the instrument panel, yet still no concrete problem can be located. For technicians, the experience is nothing to celebrate either. Let’s face it, we all have better things to do besides taking the truck into the shop or spending time trying to re-create a problem.
Click to expand image to full size
Let’s take a look at four basic steps that can help to more accurately and efficiently diagnose and resolve fault code issues.
Step 1 – First, good communication between the operator and the technician is critical to resolving a fault code. Even though setting a fault code turns on the service lamp and records the code in the control module, there is typically insight that can be gained by knowing additional operating conditions at the time the problem occurred. While in most applications the control module does record certain operating parameters from the vehicle at the time the code set, it can’t tell everything that was happening with the vehicle.
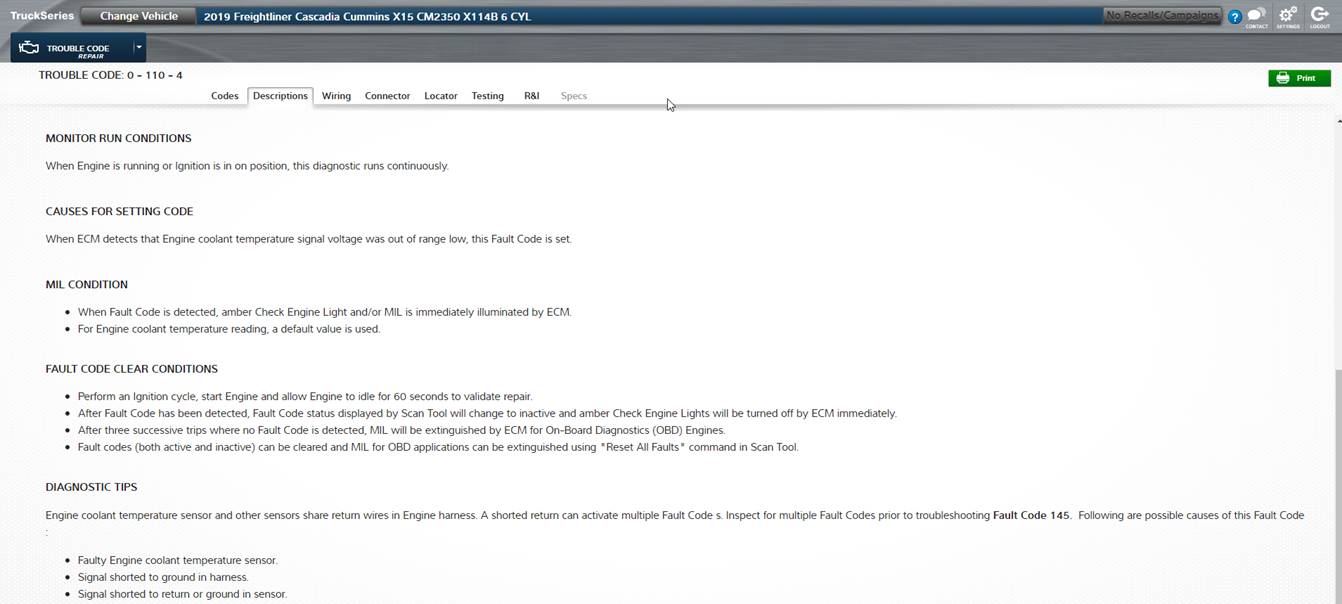
Step 3 – Gain a general idea of how the system of the related code functions and interacts with other vehicle systems. This type of information is found in service and repair data like TruckSeries truck repair information from Mitchell 1. Understanding how systems operate and work together gives you a “big picture” view that will help in tracing down why something took place to set the code.
Step 3 – Be aware that many system diagnostics begin with a series of system checks outside of the diagnostic steps for a fault code. These steps typically look at items such as proper battery voltage, control module communication with the vehicle and the scan tool, and other vehicle data depending on the system. Since these steps can be easily overlooked (yes, they take time to do) the technician may come to the conclusion that the code set was false simply because the problem exists outside of the immediate system. So, to avoid reporting the problem couldn’t be found, make sure to take these preliminary vehicle system tests that apply to virtually every fault code.
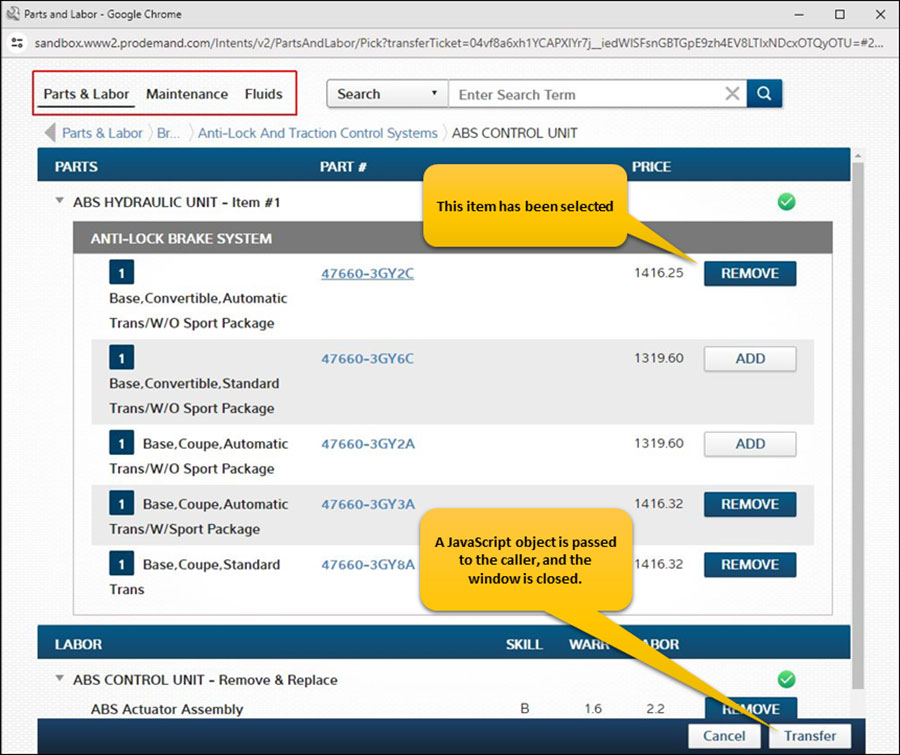
Step 4 – Compare the vehicle operation against a similar model or with a known good part. While this option may not always be available, it does serve as a solid way to determine where a problem exists without a lot of extra diagnostic time — or replacing parts that were not actually causing the fault.
Nobody wants to have a vehicle in the shop any longer than necessary. A good diagnostic process starts with the basics. As vehicles grow more complex, we may forget that the basic principles of diagnostics still apply. Look through the basic checks and descriptions in the service information and keep a firm grip on the big picture of diagnostics to reduce both downtime and come-backs.